Why You’ll Love this No Bake Peanut Butter Protein Snacks Recipe
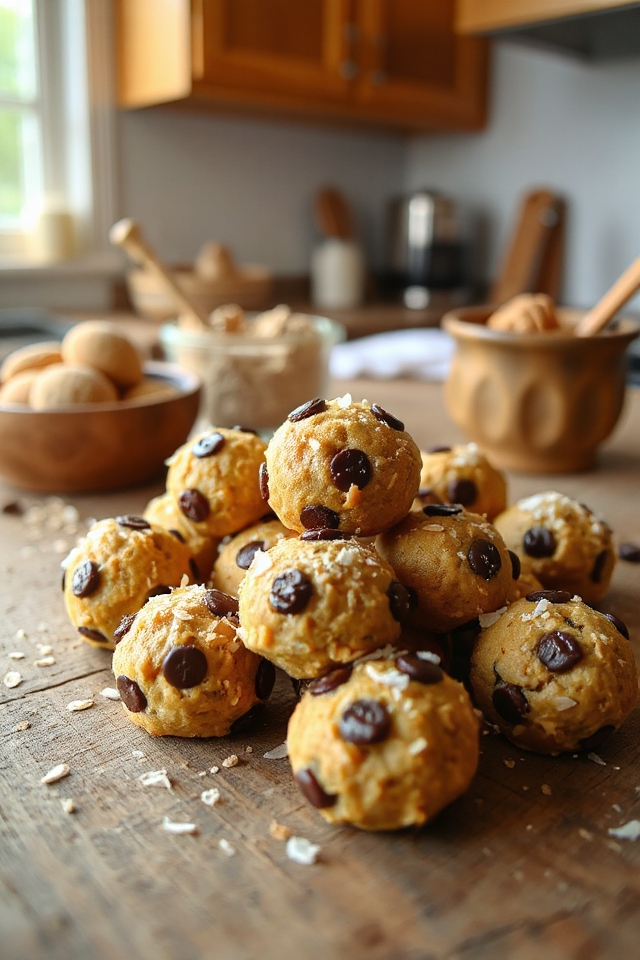
If you’re looking for a quick and nutritious snack that satisfies your sweet tooth, you’ll love this No Bake Peanut Butter Protein Snacks recipe.
It’s super easy to whip up, and you don’t even need to turn on the oven! I appreciate how versatile these snacks are; you can customize them based on what you have at home.
Plus, they’re packed with protein and fiber, making them perfect for a post-workout boost or an afternoon pick-me-up.
You’ll also love how they’re naturally sweetened without any refined sugars.
Trust me, once you try them, you’ll keep coming back for more!
Ingredients of No Bake Peanut Butter Protein Snacks
When it comes to whipping up a quick and tasty snack, these No Bake Peanut Butter Protein Snacks are a total game changer. Seriously, who’s the time to bake when you can throw everything together in a bowl and call it a day?
Plus, these little bites aren’t only packed with protein and fiber, but they also use wholesome ingredients that you probably already have in your pantry. So, if you’re like me and sometimes forget to eat after a workout or just need a little something sweet to get through the afternoon slump, these snacks are perfect.
Here’s what you’ll need to make these delicious bites:
- 1 cup Old-Fashioned Quaker oats
- 1 1/2 tablespoons honey
- 1 cup wheat bran
- 1 cup raisins
- 1/2 cup miniature M&M baking bits
- 1/2 cup unsweetened flaked coconut
- 16 ounces natural creamy peanut butter
Now, let’s talk about the ingredients for a second. You might be wondering, “Can I swap out the raisins for something else?” Absolutely!
These snacks are incredibly forgiving. If you’re not a fan of raisins, try using chopped nuts or even dried cranberries. And if you don’t have wheat bran, no worries—just toss in some extra oats.
It’s all about what you love and what you have on hand. Just remember, the key players here are the peanut butter and oats, so try to keep those in the mix.
And if you happen to overestimate your love for M&M baking bits—well, who could blame you? Just sprinkle a few extra in there; I promise, no one’s judging.
How to Make No Bake Peanut Butter Protein Snacks
Making these No Bake Peanut Butter Protein Snacks is as easy as pie—except without the baking part, which is a major win in my book. First off, grab a mixing bowl and toss in 1 cup of Old-Fashioned Quaker oats. These oats are going to give your snacks that chewy texture we all love.
Next, measure out 1 1/2 tablespoons of honey. This sweet little drizzle is what binds everything together and adds a touch of sweetness. Just think of it as the glue that holds this delicious mess together.
Then, it’s time to add in 1 cup of wheat bran. If you’re thinking, “What is wheat bran?” Don’t worry; it’s just a fancy way of saying you’re adding some fiber into your life.
Now for the fun part—let’s get to the mix-ins! Toss in 1 cup of raisins, which adds a nice little sweetness and chewiness. Not a fan of raisins? No judgment here. Feel free to swap them out for chopped nuts or dried cranberries, whatever floats your boat.
Next, sprinkle in 1/2 cup of miniature M&M baking bits. Who doesn’t love a little chocolate, right? And while you’re at it, add in 1/2 cup of unsweetened flaked coconut for that tropical vibe.
Last but definitely not least, grab that 16 ounces of natural creamy peanut butter. This is the star of the show, bringing all these ingredients together into a deliciously sticky mixture.
Once you’ve got everything in the bowl, it’s time to roll up your sleeves and mix it all together. You can use a spoon, but I find that getting in there with your hands is the best way to guarantee everything is evenly combined. Just plunge in and get messy—trust me, it’s worth it.
Once everything is mixed, take a cookie baller or just your hands, and start forming the mixture into bite-sized balls. I usually aim for about 1 inch in diameter, but hey, if you want to make them bigger (or smaller), go for it.
After you’ve shaped all your snacks, pop them in the refrigerator for a bit. This helps them set up nicely. And there you have it—snack time is officially ready!
No Bake Peanut Butter Protein Snacks Substitutions & Variations
While I love the original No Bake Peanut Butter Protein Snacks recipe, there’s always room for creativity in the kitchen.
You can easily swap the oats for almond flour or quinoa flakes for a gluten-free option. Instead of honey, try maple syrup for a different sweetness.
Add chopped nuts or seeds for extra crunch, and use dried cranberries or chocolate chips instead of raisins.
If you’re looking to boost protein, mix in some protein powder or use nut butter blends like almond or cashew.
Experiment with spices like cinnamon or vanilla extract to elevate the flavor profile.
Enjoy customizing your snacks!
What to Serve with No Bake Peanut Butter Protein Snacks
Serving No Bake Peanut Butter Protein Snacks alongside complementary foods can enhance the overall experience.
I love pairing them with fresh fruit, like apple slices or banana halves, for a revitalizing crunch. You might also consider serving them with yogurt or cottage cheese for a protein boost.
A hot cup of herbal tea or a smoothie can round out the snack beautifully. For something a bit more indulgent, try drizzling dark chocolate over the snacks or serving them with a side of chocolate hummus.
These combinations not only taste great but also keep my energy levels sustained throughout the day!
Additional Tips & Notes
To guarantee your No Bake Peanut Butter Protein Snacks turn out perfectly, I recommend measuring ingredients accurately and using natural peanut butter for the best flavor and texture.
Don’t hesitate to customize the mix-ins; nuts, seeds, or different dried fruits can add a unique twist. If the mixture feels too sticky, try chilling it briefly before rolling into balls.
Using a cookie baller assures uniform sizes, making them easy to grab on the go. Finally, store your snacks in an airtight container in the fridge to maintain freshness.
Enjoy experimenting, and have fun with this delicious recipe!