Why You’ll Love this Protein Power Balls Recipe
If you’re looking for a delicious and nutritious snack, you’ll absolutely love this Protein Power Balls recipe. I can’t get enough of these little bites of energy!
They’re perfect for a quick pick-me-up before or after workouts. Plus, they satisfy my sweet tooth without the guilt.
I love how easy they’re to make, and you can customize them to fit your taste. The combination of peanut butter and chocolate is simply irresistible.
Trust me, once you try these, you’ll be making batch after batch. They’re a great way to fuel your day while enjoying something truly tasty!
Ingredients of Protein Power Balls
When it comes to whipping up a tasty and energy-packed snack, the ingredients for Protein Power Balls are pretty simple and straightforward. You probably have most of these items hanging around in your pantry already, which is always a win in my book. I mean, who wants to make a snack that requires a treasure hunt for obscure ingredients, right?
So, let’s plunge into what you need to create these delightful little bites.
Here’s what you’ll need to gather for your Protein Power Balls:
- 1 cup creamy peanut butter
- 1 cup plain corn flakes
- 3/4 cup powdered soy protein concentrate
- 1/4 cup brown sugar, firmly packed
- 3/4 cup semi-sweet chocolate chips, finely chopped
- 1 cup sweetened coconut, toasted
Now, while these ingredients are pretty standard, there are a couple of things to keep in mind. First, if you’re not a fan of peanut butter (how can you not be, though?), you can swap it out for almond butter or sunflower seed butter. They both work like a charm and still provide that creamy texture.
Also, if you’re looking to cut back on sugar, you might want to experiment with stevia or another sugar substitute instead of brown sugar. Just remember, the texture might change a little, but hey, that’s part of the fun of cooking—trial and error, right?
And don’t be shy about jazzing things up with extras like dried fruits or nuts if that tickles your fancy. The world is your oyster when it comes to customizing these little powerhouses!
How to Make Protein Power Balls
Alright, let’s plunge into making these Protein Power Balls, shall we? It’s easier than assembling a piece of IKEA furniture, and trust me, I’ve struggled with that. First things first, grab your mixing bowl because we’re about to get our hands a little messy.
Start by taking 1 cup of creamy peanut butter and plopping it into the bowl. Now, if you’re like me and have a bit of a love affair with peanut butter, you might just want to take a spoonful and savor it before mixing. But remember, we’re on a mission here.
Next up, add in 1 cup of plain corn flakes. I know what you’re thinking—corn flakes in a snack? But hear me out; they add a delightful crunch that’s going to keep these bites interesting.
Now, sprinkle in 3/4 cup of powdered soy protein concentrate. This is where the magic happens, folks. It’s your secret weapon to packing in that protein punch. Follow that with 1/4 cup of firmly packed brown sugar—yes, you need the firmness, trust me on this.
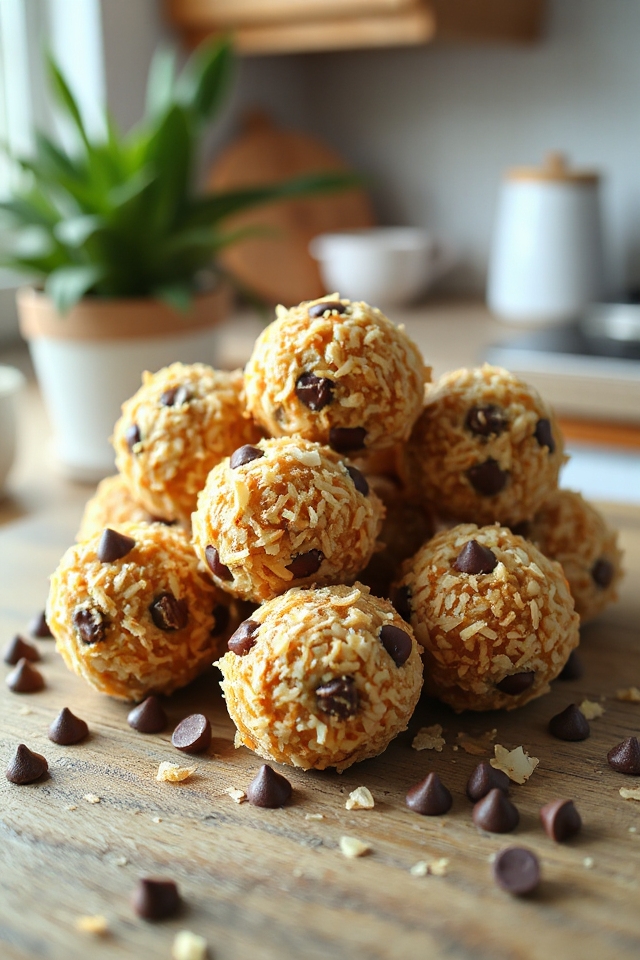
Now, for the sweet touch, toss in 3/4 cup of finely chopped semi-sweet chocolate chips. You can’t go wrong here; chocolate makes everything better, right? Finally, add 1 cup of sweetened toasted coconut. This will give your power balls that tropical flair we all crave sometimes (even in the middle of winter).
Once all these delightful ingredients are in the bowl, it’s time to roll up your sleeves and get mixing. Use your hands, yes, your hands, to combine everything really well. It might feel a bit sticky, but that’s part of the fun.
After it’s all mixed and you’re feeling like a pro chef, scoop out spoonfuls and roll them into golf ball-sized spheres. If you’ve ever rolled dough for cookies, you got this.
Now, here comes the part where you can get a little fancy—roll each ball in the toasted coconut to coat it. It’s like giving your power balls a stylish little outfit.
Once you’ve rolled all your power balls, pop them in the fridge for at least an hour. This helps them firm up nicely. A little patience goes a long way, my friends.
Store them in an airtight container in the fridge, and they’ll be ready to fuel your day for up to a week. Enjoy!
Protein Power Balls Substitutions & Variations
While the classic Protein Power Balls recipe is a hit, there’s plenty of room for creativity. You can easily swap peanut butter for almond or sunflower seed butter for a different flavor.
If you’re looking for crunch, try using oats instead of corn flakes. For a protein boost, consider adding chia seeds or hemp hearts. You might even experiment with different sweeteners like honey or maple syrup.
If coconut’s not your thing, roll them in crushed nuts or cocoa powder instead. The possibilities are endless, so feel free to mix and match to create your perfect protein snack!
What to Serve with Protein Power Balls
After whipping up a batch of Protein Power Balls, you might wonder what to pair them with for a balanced snack or meal.
I love serving them alongside fresh fruit like apple slices or berries, which adds an invigorating contrast. You could also complement them with yogurt for a creamy texture and extra protein.
If you’re feeling adventurous, try pairing them with a smoothie; the Protein Power Balls make a great addition to your drink for a filling boost.
Finally, don’t forget to enjoy them with a warm cup of tea or coffee—it’s a delightful way to enhance the experience!
Additional Tips & Notes
When you’re making Protein Power Balls, keep in mind a few tips to enhance your experience.
First, feel free to swap peanut butter with almond or cashew butter for a different flavor. If you prefer crunchier balls, add chopped nuts or seeds. For a touch of sweetness, consider adding a drizzle of honey or maple syrup.
Rolling the balls in coconut can be messy, so dampen your hands slightly to make it easier.
Finally, don’t skip the refrigeration step; it helps them firm up nicely. Enjoy experimenting with mix-ins to find your perfect flavor combination!