Why You’ll Love this Homemade Chocolate Peanut Butter Protein Bars Recipe
Whether you’re looking for a quick snack after a workout or a delicious treat to curb your sweet tooth, you’ll love this homemade chocolate peanut butter protein bars recipe.
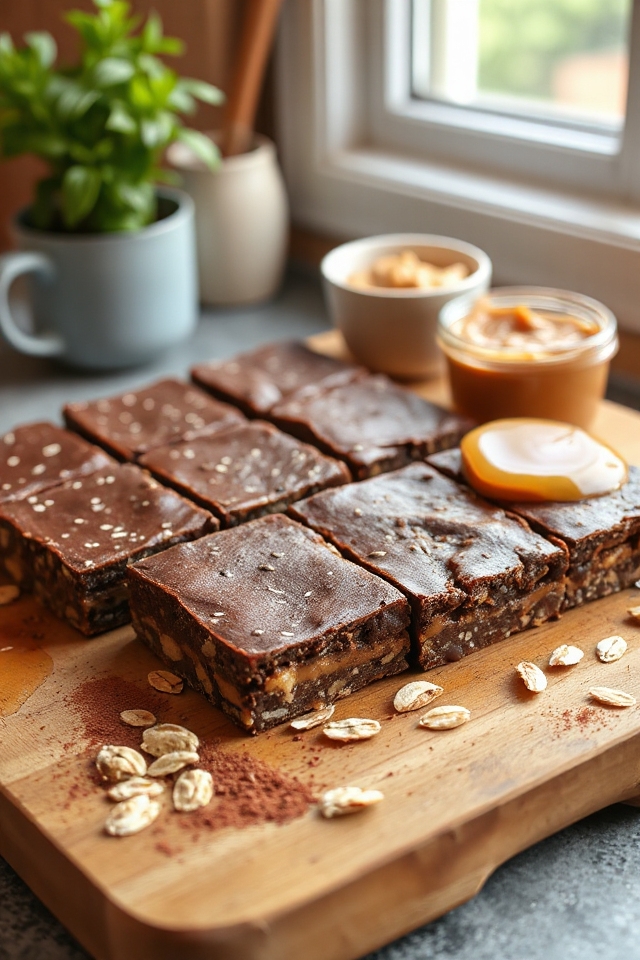
These bars combine the rich flavors of chocolate and peanut butter, making them irresistible. They’re packed with protein, keeping you energized and satisfied.
I appreciate how easy they’re to make, and they’re perfect for meal prep. Plus, you can customize the sweetness to suit your taste.
With just a few simple ingredients, I find myself reaching for these bars whenever I need a nutritious and tasty pick-me-up. You won’t regret trying them!
Ingredients of Homemade Chocolate Peanut Butter Protein Bars
When it comes to whipping up a delightful treat that’s both tasty and packed with nutrients, these Homemade Chocolate Peanut Butter Protein Bars are a game-changer. Seriously, if you’re like me and often find yourself rummaging through the pantry, looking for something quick to munch on, you’ll want these on hand.
The combination of chocolate and peanut butter is just heavenly, and I can’t help but feel proud every time I make a batch. Plus, they’re super easy to whip up – we’re talking about minimal fuss in the kitchen. So, let’s explore what you need to make this deliciousness happen.
Ingredients for Homemade Chocolate Peanut Butter Protein Bars:
- 1 1/2 cups chocolate protein powder (whey)
- 1 cup whole oats
- 4 tablespoons honey
- 1/4 cup natural-style peanut butter
- 1/4 cup ground flax seeds
- 1 cup skim milk
- 2 teaspoons sugar substitute
- 2 teaspoons olive oil
Now, as you gather your ingredients, you might want to reflect on a few things. For starters, if you’re not a fan of protein powder, feel free to experiment with different flavors or even use a plant-based option.
The beauty of these bars is their versatility. You can also switch up the nut butter; almond butter works beautifully too. And don’t forget about the oats—they’re a fantastic source of fiber, so you can feel good about indulging in these bars.
Finally, if you have a sweet tooth, adjust the sweetness to your liking. You can always add a little more honey or tweak the sugar substitute. It’s all about making these bars your own!
How to Make Homemade Chocolate Peanut Butter Protein Bars
Making your own Homemade Chocolate Peanut Butter Protein Bars is easier than you might think, and trust me, your taste buds will thank you.
First things first, you’ll want to preheat your oven to a cozy 350°F. While that’s warming up, grab 1 cup of whole oats and toss them into a food processor or blender. The goal here is to chop them down a bit—think of it like giving them a little spa treatment. You want them to be smaller, but not dust; we’re making bars, not oat flour.
Once you’ve got that done, set them aside and grab a large bowl.
Now, time to mix things up. In that bowl, combine 1 1/2 cups of chocolate protein powder, the chopped oats, 4 tablespoons of honey (because who doesn’t love a little sweetness?), 1/4 cup of natural peanut butter (your best friend in this recipe), 1/4 cup of ground flax seeds for an extra health boost, 1 cup of skim milk to bring it all together, and 2 teaspoons of sugar substitute to keep things sweet but guilt-free.
Mix everything until it’s completely combined. You’ll want it to be a thick, gooey mixture—almost like cookie dough but healthier.
Oh, and don’t forget the 2 teaspoons of olive oil; use it to grease your 9×9 baking dish after lining it with foil. This step is essential if you want your bars to come out easily and not stick like they’re auditioning for a horror movie.
Once your mixture is all set, pour it into the prepared baking dish. Spread it out evenly, and then it’s time for the oven.
Bake for about 25 minutes, or until the edges start to look golden and inviting. When the timer goes off, resist the urge to plunge in right away. Let them cool for a bit—trust me, it’s worth it.
Once they’re cool, cut them into 6 bars, and voilà! You’ve just created a delicious, protein-packed snack that’s perfect for when you’re on the go or just need a little pick-me-up.
Now, who’s ready to dig in?
Homemade Chocolate Peanut Butter Protein Bars Substitutions & Variations
If you’re looking to switch things up with your Homemade Chocolate Peanut Butter Protein Bars, there are plenty of substitutions and variations to explore.
You can swap the chocolate protein powder for vanilla for a different flavor. Try almond butter instead of peanut butter for a nutty twist, or use pumpkin puree for added moisture.
If you prefer a crunch, add chopped nuts or dark chocolate chips. For a lower-carb option, substitute oats with almond flour.
You can also experiment with different sweeteners like maple syrup or agave. The possibilities are endless, so feel free to get creative!
What to Serve with Homemade Chocolate Peanut Butter Protein Bars
While you might enjoy your Homemade Chocolate Peanut Butter Protein Bars on their own, pairing them with the right accompaniments can elevate the experience.
I love serving them alongside a rejuvenating fruit salad, as the natural sweetness of fresh fruits complements the rich chocolate and peanut butter flavors.
Alternatively, a dollop of Greek yogurt adds a creamy texture and a boost of protein.
If you’re in the mood for something warm, a cup of herbal tea or coffee pairs beautifully, enhancing the chocolatey goodness.
These simple additions make my snack time even more enjoyable and satisfying!
Additional Tips & Notes
Here are a few additional tips to guarantee your Homemade Chocolate Peanut Butter Protein Bars turn out perfectly.
First, make sure to measure your ingredients accurately; even slight variations can affect texture. If you prefer a sweeter bar, you can adjust the sugar substitute to taste.
I also recommend letting the bars cool completely before cutting; this helps them hold their shape better.
Feel free to customize your bars by adding nuts or dried fruit for extra texture and flavor.
Finally, store any leftovers in an airtight container in the fridge to keep them fresh for longer.
Enjoy your delicious creation!